My wonderful cousin Kaila got about 500 pounds of apples off the tree at her new house and was kind enough to give some to me. Since the apples were free and readily available I decided to attempt to make some applesauce. It was messy but a really fun family affair!
Homemade Applesauce Recipe and Canning Instructions
Step 1: Get your pot ready
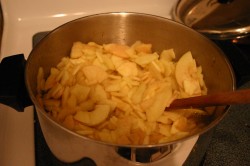
I used my biggest pot and put a little water in the bottom to keep the apples from sticking. As I peeled the apples I just started throwing them in to start cooking.
Step 2: Peel a TON of apples
I used my handy dandy apple peeler which the kids thought was WAY fun to help with. If you don’t have one of these peelers, you can always try the method which Kaila’s husband came up with. Check out this video, it’s hilarious. Just as a reference, I used about 14 pounds of apples (before coring/peeling) and it netted 5 quarts of applesauce.
Step 3: Cook up those apples
By the time we were done peeling all the apples the first ones were really well cooked. I just let the whole thing cook for about 10 more minutes to make sure they were all soft.
Step 4: Prepare your canner and jars
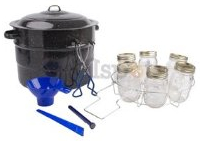
While the apples were cooking I ran my bottles in the dishwasher to sterilize them. I also filled up my canner and started to boil the water. Lastly, I started some small pots of water boiling to sterilize my lids and rings. If you are new to canning, I would HIGHLY recommend getting a Home-Canning Kit to get all the tools you need to do proper canning. If you don’t have a canner or jars yet you can buy an all-in-one kit which will include EVERYTHING you need to get started!
Step 5: Make the applesauce!
Once the apples were all soft, I used my hand-me-down 1970’s-style baymix to puree them. I’m not sure why I call it a baymix but that is what my mom always called it when I was growing up. I couldn’t find the exact one online to show you, but I absolutely LOVE mine. Some of these hand blenders look similar but I can’t vouch for them. You could also use a food processor or even a blender to do the pureeing. But the baymix was SO easy because I could do it straight in the pan. At this point you can add any seasonings you want. I added 2 cups of sugar but could have gotten away with just one. Ours turned out really sweet and delicious. Some people like to add cinnamon or other things but I prefer to just add those when we eat it.

Step 6: Pour the applesauce into jars and seal ’em up
Use a funnel as this can get really messy. I ladled the applesauce in leaving about 1/2 an inch of space at the top of the jars. Then I used my tongs to pull out a lid and ring for each jar. Try not to touch these things with bare hands as you don’t want them to get unsterilized. Screw the ring on tight once the lid is on.
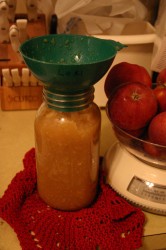
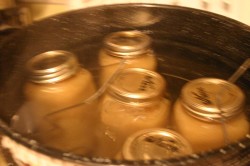
Step 7: Put your jars into your canner and boil (make sure the water goes ABOVE the jars. I added more after this picture.
As I filled each jar I would put it into the canner. As you put more jars in the water level rises, so you don’t need to start with the canner all the way full. Once I had all 5 jars in I filled up the canner to cover the jars with hot water. You have to wait until the water is boiling before you start timing. Let it boil for 20 minutes and then remove the jars. Way easy huh?
Step 8: ENJOY! (my kids sure did)

For more canning recipes and ideas we recommend the Ball Complete Book of Home Preserving. I got it from my mother-in-law for a gift and I use it a TON!

-Jodi Weiss Schroeder
http://foodstoragemadeeasy.net


