Three years ago I swore I didn’t have enough time, energy, or desire to do things like bake my own bread, can my own jelly, dehydrate my own foods, or basically do much cooking from scratch at all. It’s funny how when you begin to be interested in something it becomes easier to MAKE time.
Well another thing I NEVER would have thought I would be doing is raising BACKYARD CHICKENS! Yes Julie thought I was crazy when I cooked up this scheme, but somehow once I got into growing and preserving my own foods, it seemed like a natural progression to want to gradually work towards being even more self reliant.
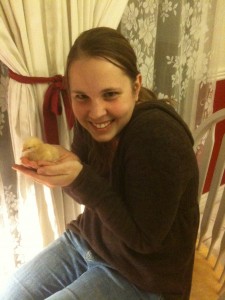
I have shared snippets of this adventure on our Facebook page and quite a few people asked for me to share some details so here goes nothing.
Where I Got My Information
Free class at my local library: Keep your eyes open for these types of events. I always grab all the flyers for free classes and this one about raising chickens caught my attention. She went over the basic rules for having chickens in our area, and helped us know what costs and what amount of work to expect. To be honest she scared me a little into thinking it was going to be a much larger undertaking then I was expecting. My husband actually was the one who encouraged me to keep pursuing it.
Story’s Guide to Raising Chickens: This book is sort of like an encyclopedia for chickens. I started reading through the whole thing but it also made me feel a bit overwhelmed thinking about all of the potential problems that could arise. I decided to only look up certain things as they came up, instead of panicking myself about every topic. It has really great in depth information that I have used a lot already.
Minnie Rose Lovgreen’s Recipe for Raising Chickens: This book I DID read cover to cover. I got it after I already had my chickies and I think it is great. It makes me feel like I am listening to a cute old lady telling me about how much she loves her chicks and how to take care of your own chickens. I would definitely recommend it for beginner chicken owners 🙂
BackyardChickens.com: This website is full of information and an active forum and it definitely filled in all the cracks as I was doing my research and getting started. We got lots of ideas for building our coop from here.
Getting Started
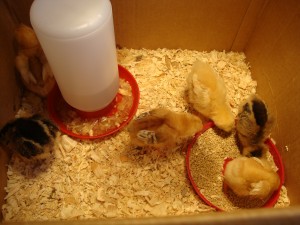
We started out by going to IFA and checking out all the baby chicks. My kids loved them (me too!). We picked breeds that are good for laying and have nice dispositions. We followed a chart found in our chicken book. We bought a heat lamp, some pine shavings, a little feeder tray, a 5 lb bag of chick food, and a water tower. The chicks themselves were only about $3 each and we bought 6. Total cost for everything was less than $50. We kept them in a cardboard box in our kitchen and I thought they would work well there until the weather warmed up and our coop was finished being built. Little did I know …
Growing Up
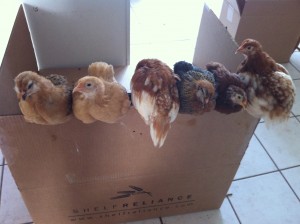
Well I soon discovered that the chicks like to perch on the top of the cardboard box (who knew they could fly that high so young?) This resulted in them hanging their bums over the edge and pooping on my kitchen floor. NOT FUN. Eventually they got brave enough to jump OFF the box and run around in the kitchen too. I finally started putting my baby gate over the top as often as possible to keep them contained. It was too much for me when they started escaping and sneaking into the family room. NO GOOD!
I moved up to a rubbermaid bin thinking that would be better than the cardboard box but it wasn’t much of a solution either. Finally I found a HUGE cardboard box and that is where they lived for the next few months. It was such a late cold spring here that I could not put them outside in that weather. I also had to upgrade to larger food dishes because they would knock over or empty the food and water or kick wood chips in the water and make it undrinkable. I was annoyed by the constant refilling. Getting bigger containers and putting them up on bricks helped with that quite a bit.

Moving Out
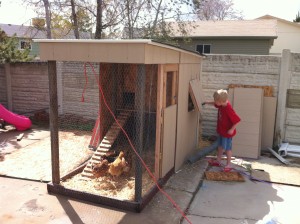
The process of building a coop and moving the chickens outside was a lot longer than I wanted. We had fights about just buying one versus building one. In the end, my husband’s stubbornness won out. He insisted he could make one bigger and better and cheaper than a store-bought one … and he was right. But in my defense, it DID take him a lot longer than if we would have just bought one. All kidding aside, he did a great job and he just pieced together the plans based on a few coops we have seen and on what I wanted. He got all the materials at Home Depot and the whole thing was about $200. Didn’t he do a great job? Oh and we also upgraded to heavy duty big food and water units that we hang from the ceiling underneath the nesting area. My son is peeking into the nesting box through the door we will use to collect eggs, yay!
Laying EGGS?
My girls are about 4 months old now. I have heard that they start laying anywhere between 4 and 6 months. I am so excited I can’t wait! They eat about a 25 lb bag of food a month right now which I also supplement with a little bit grains out of my food storage for treats and they also go out in the yard every day and run around and eat bugs and weeds and try to get into my gardens. My kids have had a lot of fun with the chickens and I’ve enjoyed them too. They are fun to take care of and I only have to check their food and water about every 2-3 days now. It will be interested to see how the upkeep changes in winter time, and it will be FUN when we get fresh eggs!
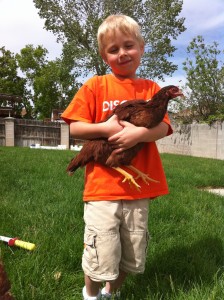

Hopefully that helps you get a little look into what it’s like to have (and get started with) Backyard Chickens. Thanks for sharing my adventure with me 🙂

-Jodi Weiss Schroeder
http://foodstoragemadeeasy.net

