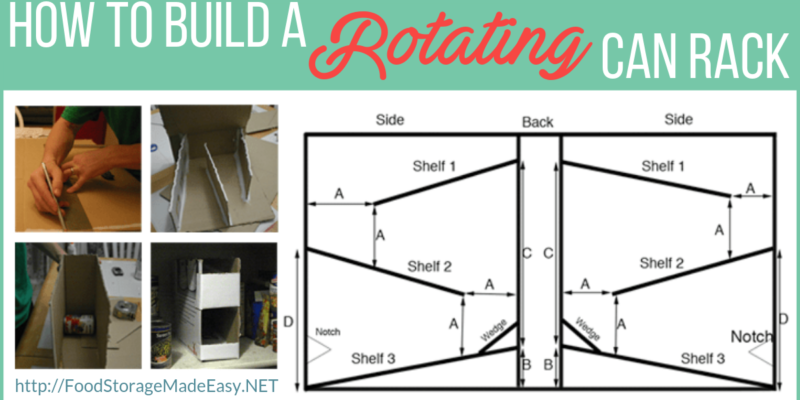
Want to make the most out of your shelving space but don’t have room for a large rotating can rack? Building your own rotating can rack (or a set of them) out of cardboard may be the perfect solution for you! These can be customized for different can sizes and if you are really creative […]
food storage
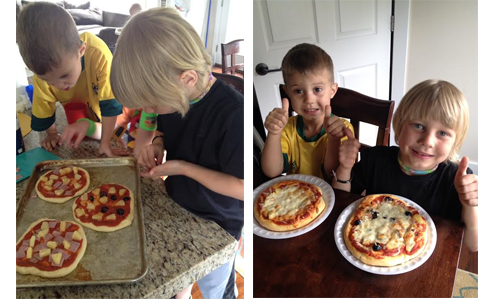
3 PIZZA DOUGH RECIPES
Pizza is a FAVORITE around here. Whether it be take-out, gourmet, or homemade we are always up for pizza. Today we wanted to share with you 3 different ways to make homemade pizza dough. Depending on your time frame and preferences one of these will for sure be a hit! The fastest way to make […]

PREPAREDNESS SPRING CLEANING ZONES
Do you have a standard spring cleaning list? You may want to add some of these preparedness tasks to your list this year.
Jodi’s 2014 Food Storage Resolutions
This week Jodi shares her food storage resolutions for 2014 which include trying new recipes, some gardening tasks, and a new plan for her three month supply.
Julie’s 2014 Food Storage Goals
Find out what Julie’s food storage New Year’s Resolutions are this year, hint it involves USING her food storage 🙂

Best of Food Storage Made Easy 2013
Check out all the best posts and recipes of 2013, all in one spot. You won’t want to miss anything!
 Hi there! I’m Jodi. I share my preparedness adventures via the blog and social media so you can see what I’m working on day to day.