Everybody has different ways of organizing their recipes. When I got married my little sister copied all of my mom and mother-in-law’s recipes onto 3×5 cards for me. This worked for a while, but as I started using them it became apparent it wasn’t so great for me. I like to make my own tweaks to recipes so my cards soon became full of notes with my modifications. I also managed to spill on my cards quite frequently. The final straw was when my cousin Emily and I decided we wanted to do a giant recipe swap to get new ideas for dinners. Copying a billion cards was not a very attractive option so we came up with a master plan that I LOVE and wanted to share with you.
Learning to cook with your food storage causes a lot of people to use foods they aren’t used to, to try lots of new recipes using these new foods, and to tweak their own recipes to make them more food storage friendly. Having a good system in place can save you a lot of hassle, and it can also save your laptop from getting trashed by keeping it open on the kitchen counter while you cook. Not to mention you need your recipes in a usable format in case you can’t use the computer during an emergency situation.
How to Make a Recipe Binder
Step 1: Buy a few 1/2 size binders, depending on the number of recipes you will have.
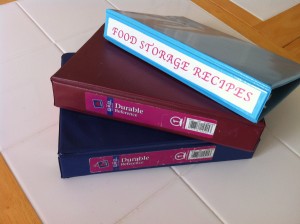
I started with 2 binders of different colors. One for main dishes, one for sides and desserts. I got these ones at Wal-Mart. I recently added a third one specifically for “Food Storage Recipes” that I wanted to keep track of separately since they aren’t our normal family favorites. This binder is a little nicer and has the plastic around it that you can slide a cover or side label in so I liked it. I got this one at Office Depot I believe.
Step 2: Buy colored paper or card stock.
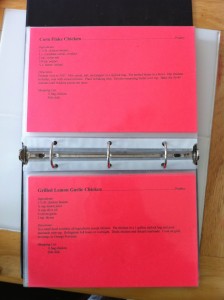
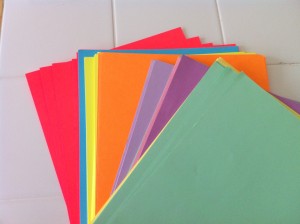
I color code my recipes so at a glance I can easily get to the right section. For example when I am doing my weekly or monthly grocery lists I choose a variety of chicken recipes or beef recipes depending on what’s on sale and how much meat I am buying. For chicken recipes I know to look in the red section. This works for me but you don’t have to do it that way if you don’t want. You could do all one color and just alphabetize them. Using card stock will make them a little more sturdy, but also makes less pages able to fit in one binder. Paper works just fine too. I chose my paper depending on the colors that were available at Wal-Mart, so one batch is paper and the other is card stock.
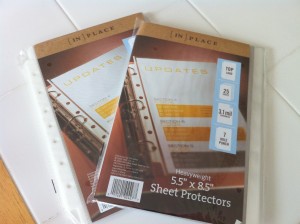
Step 3: Buy 1/2 page sheet protectors
These are a little bit hard to find. When we first came up with this idea they were not available at any local stores so we ordered a big batch of them online to share between a few of us and they were pretty cheap. I have found them at office stores recently when I have needed to buy more. They are a little pricy but I LOVE the half page size. They are perfect to keep on the counter and you can fit a lot of recipes in one binder.
Step 4: Make your recipe file
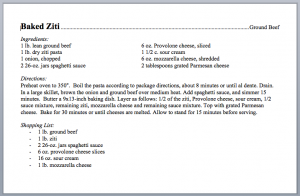
There are a few ways to do this depending on how computer savvy you are. My cousin decided to make an Access database for hers. I am not that ambitious so I made a few different word documents. You can just type up two recipes per page making sure you start the second recipe halfway down the page. This is easy, but hard to make turn out evenly. You can also set your document to be 2 “pages” per sheet of paper and then you can line up the text at the top of each page. This is how I did it for my first two binders. (You can download my file to get an idea for how this works, I can’t guarantee compatibility with your computer setup though).
I just figure out a way I think is easier that I am starting on for my food storage recipes binder. I set my pages to landscape and do one recipe per page, formatting them to fill up as much of the page as possible. Then when I go to print it I can simply choose “print 2 pages per sheet” and it will shrink the pages and print them two per page. It’s awesome! Make sure you can find that setting for your printer before you setup your whole binder file this way though. I like to put the product category at the top of each recipe, even though I use the color coded pages too. You can choose to do that or not.
Those methods make pages that sit horizontally in your binder, you can also make vertical pages if you like your recipes that way instead. You will just have to set up your pages differently.
Step 5: Print your recipes and cut the pages in half
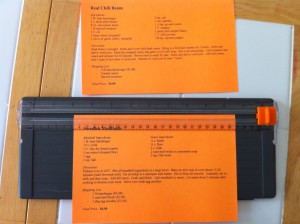
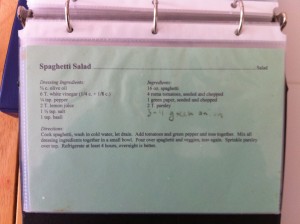
Make sure you pay attention if you are doing the color coded pages. You will only want to print one category at a time to make sure that you are using the right colors. After you have them all printed, you can cut them in half with a little scrapbook paper-cutter or just use any scissors. Just depends how perfectly even you want them to be. Slide all of the pages into your sheet protectors. I put two recipes in per sheet protector so they show on the front and back. If you wanted to figure out double-sided printing you could get away with using less paper, but it was getting too complicated for me to do that so I just cut each one out separately and stuck them both in.
Step 6: Enjoy and SHARE!
I LOVE how my binder sits on my counter and I can wipe the sheet protectors clean if I slop on them. I love making notes with a dry-erase marker and updating my typed recipes next time I am adding to the recipe file. I love printing or clipping out recipes to try, and sticking them in temporary sheet protectors until I try them or have time to add them to my file. And best of all, now I can easily SHARE my recipe file with family and friends. They can put it together in a way that works for them, or I can make a cute binder for them for gifts 🙂

-Jodi Weiss Schroeder
http://foodstoragemadeeasy.net

