
Purchase items necessary for baking such as oil, sugar, powdered milk, salt, etc.
Key Points
- The ingredients in Step 7 are all the necessary fats, oils, sugars, milk, and miscellaneous items that you need to put food storage meals and recipes together.
- Purchasing these items when on sale, then rotating through your stored supplies can save you time and money.
- Find ways to use these ingredients in your everyday cooking, start learning how to make things from scratch. Check out our Cooking From Scratch Page for some ideas on how to do this.
- Look at our article “What Can You Do With YOUR Food Storage” to see what additional items you can make by adding these items to your storage.
- Determine the quantities of each food item you will need to store. For more information, see BabyStep 4.
Fats and Oils
- Salad Dressings can be store bought and stored, or you can make your own oil and vinegar-based, or mayonnaise-based dressings with items you have on hand in your food storage. Be aware of expiration dates on store bought salad dressings.
- Cooking Oil such as canola, or vegetable oil can be used in most bread recipes. Unless they have been specially treated, *unopened* cooking oils have a shelf life of about a year.
- Shortening has a longer shelf life than oils, it is reasonable to expect an unopened metal can of shortening to have a shelf life of eight to ten years if kept reasonably cool, particularly if it has preservatives in it.
- Mayonnaise can be used in baked dishes, pasta salads, salad dressings, and much more. Although it isn’t necessary to sustain life, it sure makes things taste better. Mayonnaise has a shelf life of 2-3 months.
- Peanut Butter provides protein and monounsaturated fats (the good fat). Peanut butter has a shelf life of 6-9 months.
Sugars
- Powdered Fruit Drink comes in many different flavors and can be used in daily use and in times of emergency as stored water can have a funny taste. Powdered drink mixes can be stored for up to 3 years if unopened.
- Brown Sugar can be used in many baked goods and even some bread recipes. It can be stored up to 6 months. Be careful to seal it tightly between uses if you have opened your sugar. Some people choose to store white sugar and molasses to make their own brown sugar to avoid dealing with shelf life issues.
- Molasses and Corn Syrup are used as sweeteners in many recipes. Store according to your families needs. Molasses may be something you have never used, nor ever will use. If this is the case, don’t feel the need to store it. If you choose not to store brown sugar, you will want to store MORE molasses in order to make your own.
- Flavored Gelatin is used in molded desserts and salads and to thicken cold soups.
- Jams or Preserves is covered in Baby Step 8 (Fruits and Vegetables)
- Granulated Sugar is used in almost all food storage recipes and is very important to store. Sugar has a shelf life of 20+years.
- Honey is another sweetener found in a lot of food storage recipes. Honey is more expensive then sugar and usually acts as a substitute for sugar in breads. Some people feel it is healthier to use honey than sugar.
Powdered Milk
- Nonfat Dry Milk is much cheaper then regular milk. To make your nonfat milk taste better, try adding 1 tsp of sugar, and 1 tsp of vanilla to a gallon.
- Evaporated Milk can be stored in cans, or made from nonfat dry milk. To make a 12 oz can of evaporated milk from dry milk, mix 1-1/2 C. Water and 1/2 C. + 1 T. Dry Powdered Milk and blend very well.
Miscellaneous
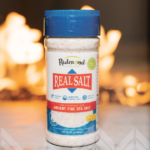
- Baking Soda, Salt and Baking Powder are used in most recipes and if unopened have indefinite shelf lives. Definitely make sure to keep these ingredients on hand for your favorite recipes.
- Active dry yeast is the form of yeast most commonly available to noncommercial bakers, as well as the yeast of choice for situations where long travel or uncontrolled storage conditions are likely.
- Instant yeast appears similar to active dry yeast, but has smaller granules with substantially higher percentages of live cells. It is more perishable than active dry yeast, but also does not require rehydration, and can usually be added directly to all but the driest doughs.
Other Dairy
- Powdered Eggs can be used to create a lot of different recipes that will help you have variety in your diet in an emergency. They are also cheaper than regular eggs so rotating them into your regular cooking makes a lot of sense.
- Butter can be purchased in powder or canned form. We don’t recommend canning your own butter due to health reasons, but commercially canned should be fine. Storing butter is not very cost effective so we don’t recommend storing a lot of it or making a large effort to rotate it into everyday cooking.
- Sour cream is available in powdered form if it is something you really would miss if you were living in emergency circumstances. We don’t find it necessary but some people may wish to store keep a little on hand just in case.
More Information

Where to Buy Baking Ingredients
 |
 |
 Hi there! I’m Jodi. I share my preparedness adventures via the blog and social media so you can see what I’m working on day to day.